
Working in the agent application
When the chat is installed on your website one question usually arises - how can I receive messages from the website? To do this, you should use one of our agent applications.
It can be installed on a PC (Windows) (MacOS) or you can open it on a browser - web-application. There are also mobile applications which you can download from this page.
If you registered on our website and installed the chat on a website or sent the chat code to developers, you should install the application from the links above and log into it using your JivoChat email and password.
If the one who registered added you as an agent you would have received following email:
Please use the "Install JivoSite Application" or download the application from the links above.
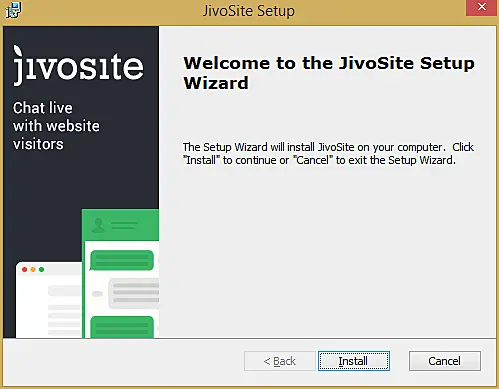
An installation file jivosite.msi (for Windows or another one, it depends on you OS version) will be downloaded to your PC.
The installation process is very simple - you should run the file, press "Install" and wait a little bit until the installation is finished.

After the installation is completed, you can run the application from a shortcut on your desktop or from the Start menu > All applications > Jivosite
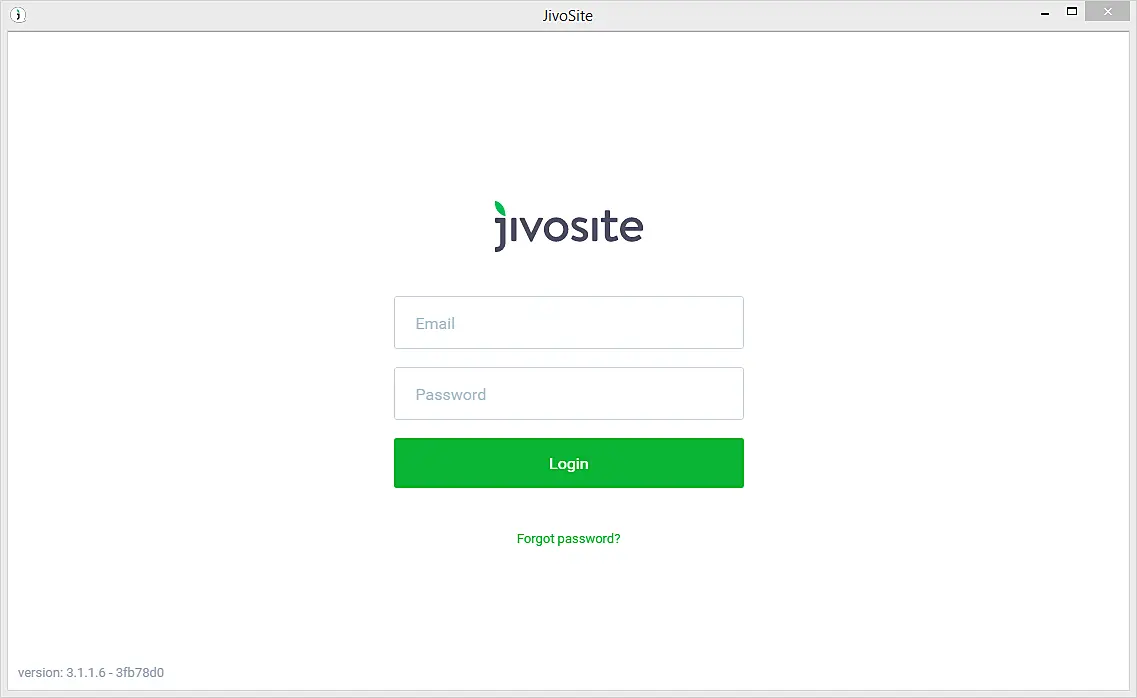
You will see a welcome message while the app loads. After that, the login screen will be displayed - insert your JivoChat email and password. Please note that email address should not contain capital letters.
When you press the LOGIN button you will see the application window. You will be asked to check the microphone settings on the first start if the "calls" feature is enabled for your account. You can skip this test and run it later or start the test by pressing the "start" button.
If you hear yourself in the echo test, then your microphone settings are correct and you can use our optional calls features.
Basic features
Let's look at the basic elements of the application's interface.
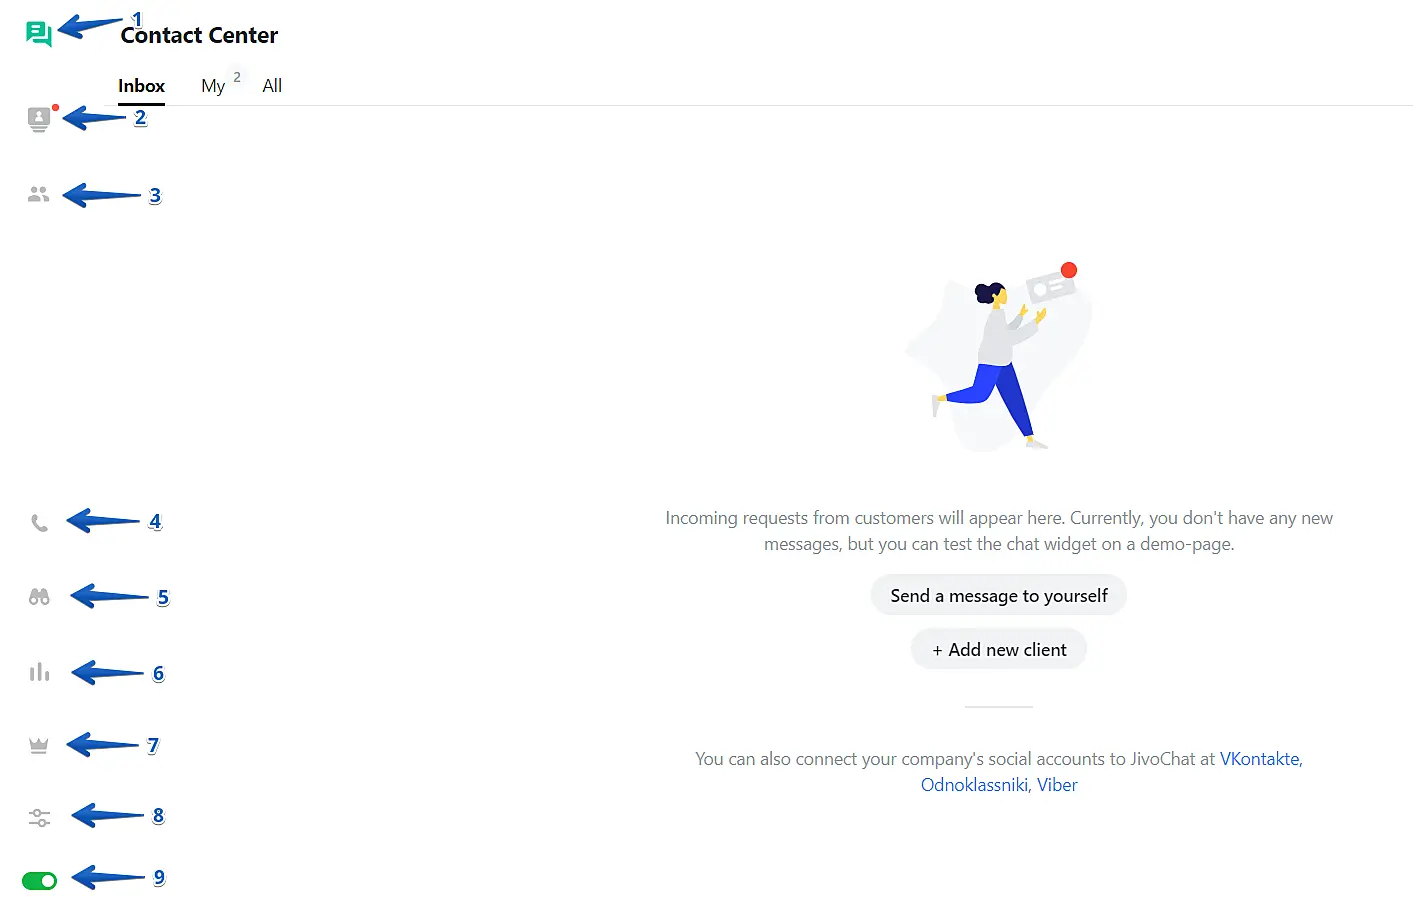
1. Contact Center All incoming chats will appear on this tab. Check out this tutorial for more information: Click Here!
2. CRM In this secction you will handle clients, tasks (reminders) and sales funnel. For more information please check this link.
3. Team List of the agents. All agents who are added to your account are listed in this field. There is a circle icon on the right side of the agent's name which shows the agent's current status: green - agent is online, yellow - agent is in "away" mode, no circle - agent is offline.
If you click on the agent's name, a chat will be opened with that agent. You can chat with your colleagues just like with your visitors. The history of the chats between agents is stored only in each agent's application.
If you're an admin, you can access the settings of each agent by clicking on the Settings icon on the right side of each agent statistics.
In this tab you will also have access to groups (create groups so you can share information with your team)
4. Phone Here you can access the dial pad to call your customers using the JivoChat app.
5. Visitors You can monitor your website's visitors on this page. You can find more about this in this article.
6. Statistics In this secction you will see all of the stats from your account. You can check onlne time from your agents, total number of calls, missed chats, download an aggregated report and other data of interest.
7. Pro Version Buy the Pro Version of our chat directly from the app. You can select the number of agents and license period.
8. Manage All application and account settings are stored here.
9. The "Away" switch This switch allows you to enable "Away" mode. You may use it if you want to take a break but do not want close the application. In this mode you will be offline for new visitors on your website but will be able to continue current chats. The switch will be yellow when Away mode is enabled and green when you are online. You can set an autoaway option, please check this tutorial.
Starting a chat
When visitors open your website they see the chat window. Most dialogues are started from an automatic invitation - the chat pops up with the invitation and the visitor can send a message in reply.
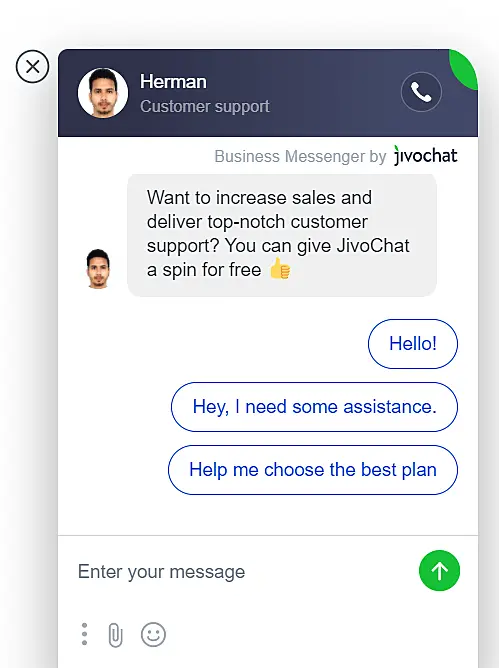
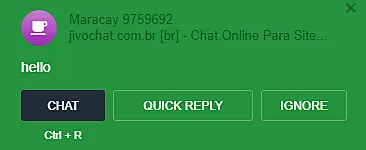
When visitors send a reply message, you will see a chat request notification at the bottom right corner of your screen:
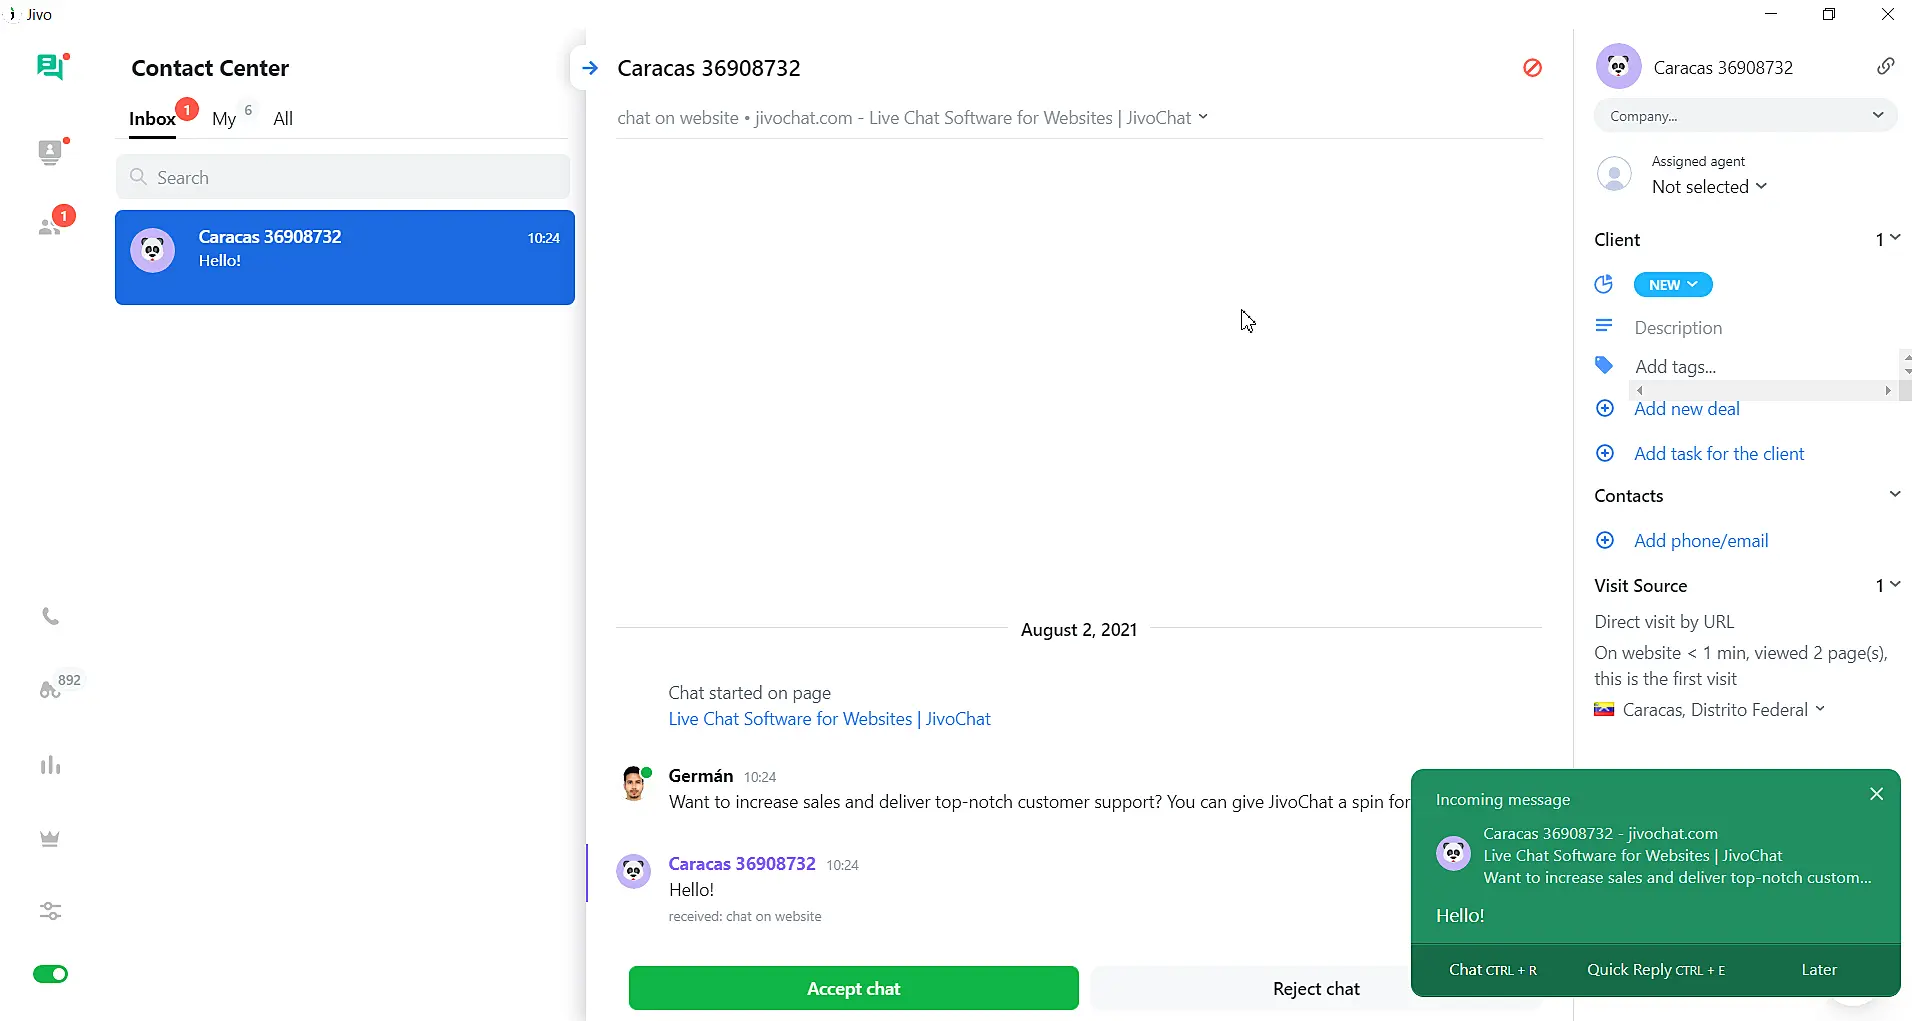
This is what it looks like:
1. Name of the visitor If the visitor did not fill the contact form before the chat the name would look like "Maracay 975" (when the city was detected for a visitor) or "Client 40" (when the city was not detected). The number in this case is visitor's internal identifier. The ID is assigned for every visitor who enters on the website.
2. The current URL of the visitor Its from the URL from which the client started the conversation.
3. Visitor's message (message sent by the visitor)
4.Three buttons: Chat, Quick reply, later:
- When you press the Chat button the application window will be opened and from there you will be able to answer the visitor.
- By pressing the Quick reply button you can send a message to the visitor directly from the notification window. The application window will not be opened.
- When you press the Later button for the first time the chat request will be sent to all online agents. If they also ignore it the chat, you will see the notification two more times and if you hit ignore for both of those times, the chat will be counted as missed and the visitor will see an offline form. Please note that you cannot answer missed chats from the agent's application, these chats are stored only in the "all" secction.
Chat window
When you click on the Chat button you will see a window such as this:
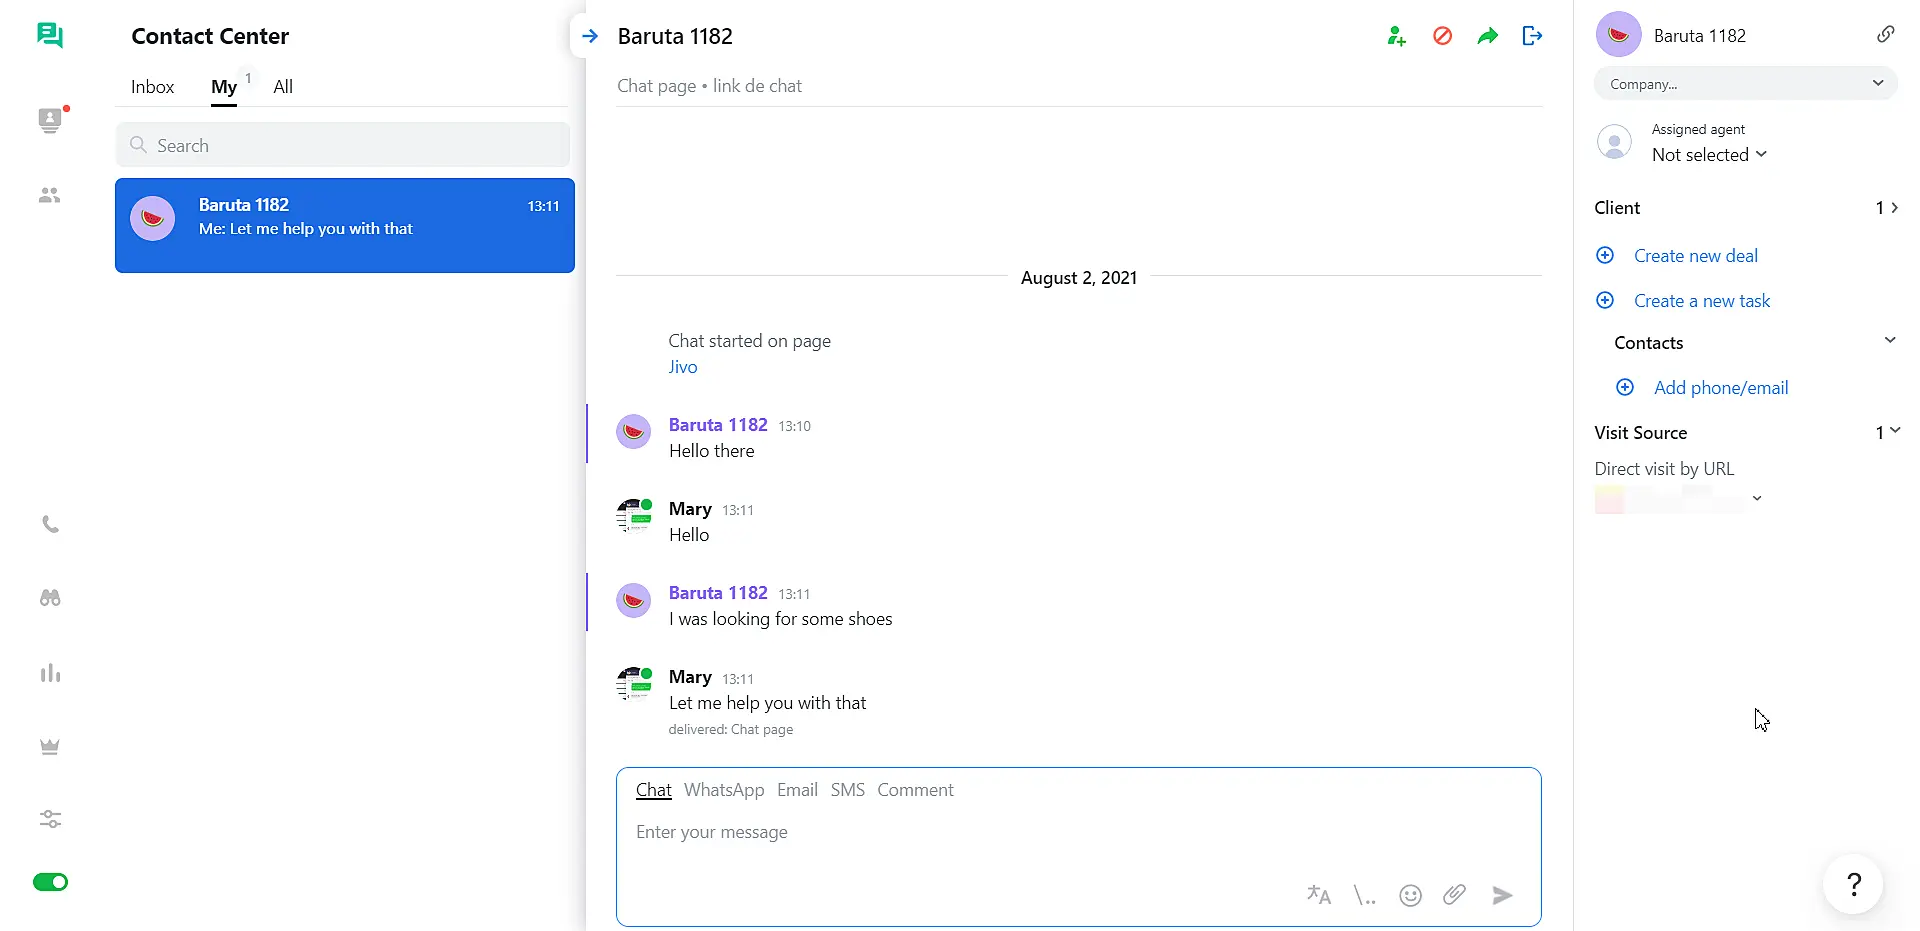
Your messages and messages of the visitors are displayed in the big middle section, and the text input field is placed at the bottom. On the left side you will see the visitors and agents lists and on the right side - the client's information.
You can switch between the visitors by pressing on their name in the list, in this case the text that you are writing will be saved if you are interrupted and switch to another visitor. You can close the chat by clicking on the "leave chat" button on the right from the visitor's name, but it is better do not close the chat until visitor has left the website as they can have new questions. When the visitor closes the website their icon will become white.
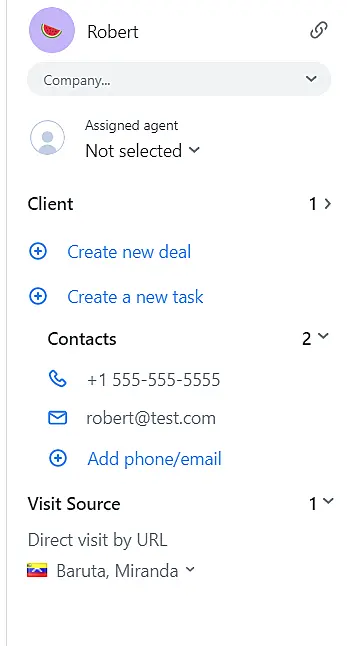
Detailed visitor's information is displayed on the right side of the chat:
- Visitor's name, email address and phone number (if the visitor did not send this information via contacts form the visitor's city and ID would be displayed).
- Visit source - here you can find information about the visit source, for example Search in Google or UTM codes.
- Website - the name of the website which is set in the admin panel > website settings > options.
- Time on site - time that visitor has spent on the website.
- Current page title. The page URL will be displayed on mouse hover. The navigation history will be shown on mouse click.
- Number of visits on your website and number of the viewed pages in current session.
- Location of the visitor - country, city, Internet provider name and IP address.
In the same panel we have added some interesting functionalities that will help you during your workflow.
Assigned agent: You will be able to assign an agent so the next time they come to chat, and if this agent is available, they will be assigned to them. See more details in this link
Deals: You can create a sales funnel and see the status of your clients. Check more here.
Tasks: You can assign tasks to your agents so they don't forget to contact a client. Check it out here.
Chat functions
You can find several buttons at the top right corner of the application (right beside the name of the visitor).
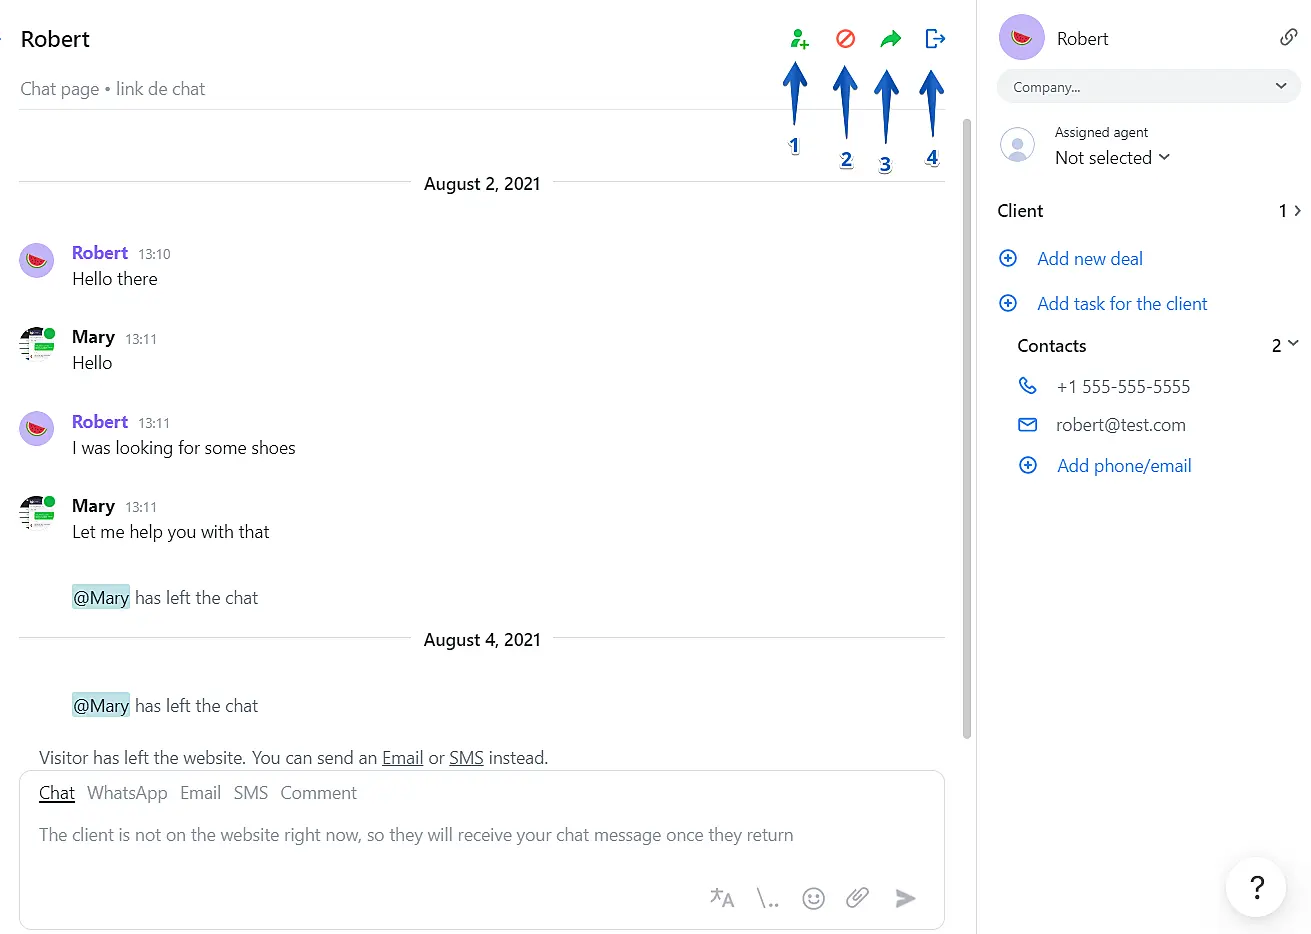
- Invite. Invite other agents to join a chat with you and assist clients as a team.
- Spam. This feature allows you to ban unwanted visitors and they will not be able to use the chat.
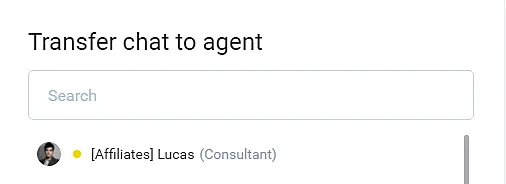
- Transfer chat. You can transfer a chat to a colleague. To do this, press the "Transfer chat" button and select an agent
- Leave Chat: Close the chat from the agent side only when needed (this won't close the chat for the customer)
Next, type in a message that will be displayed to the agent (visitors cannot not see this message) and click "Transfer":
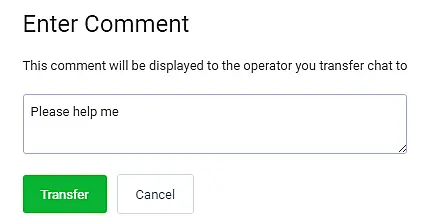
It's done! If your colleague press the Accept button, the chat will be transferred.
During chat features
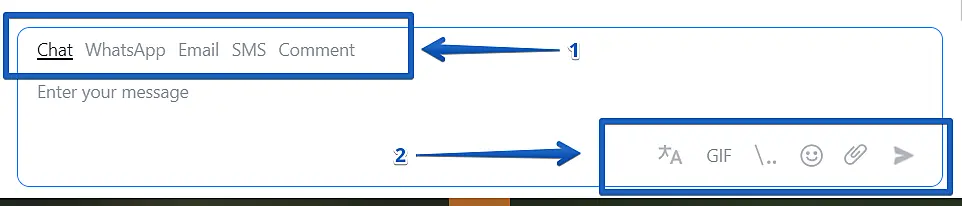
Divided in 2 parts
FIRST (top left side)
Chat: Chat in the website with your visitor.
WhastApp: When you connect a WhatsApp account to JivoChat, you will be able to answer via WhatsApp with a template message, for more information check this link
Email: You can answer your client via email when they leave the website.
SMS: Available for a few countries. Buy a number from JivoChat so you can send and receive SMS.
Comment: Leave a comment so your colleagues know the issue from the customer without reading the chat history.
SECOND (lower right side)
1.Automatic translator: If you receive a chat on a different language, you can click on this icon and it will translate your customer's messages and it will also translate your response. Check our image to see how it looks like:

- GIF: Search GIFs directly from the JivoChat app and send them in only one click.

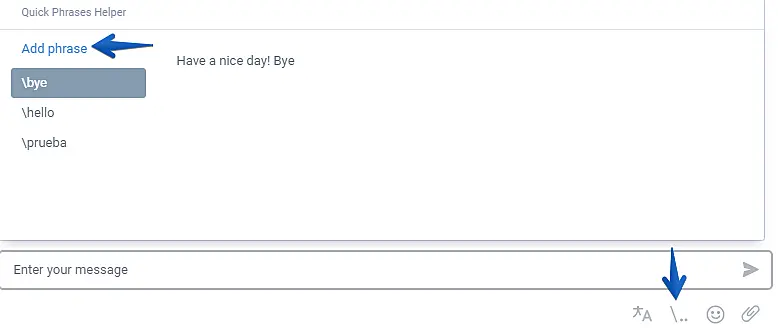
- Quick Phrases: You can save templates of phrases that your agents can use anytime. This saved responses will save you time You can save it on the agent app and all of your team will be able to use it.
Follow the steps on the screenshot below to add a phrase:
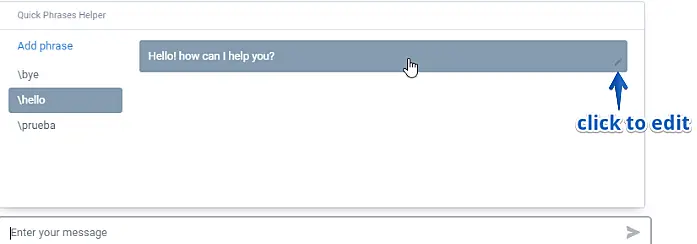
You can also edit your current phrases by clicking on the tiny pencil located on the right bottom corner of the phrase:
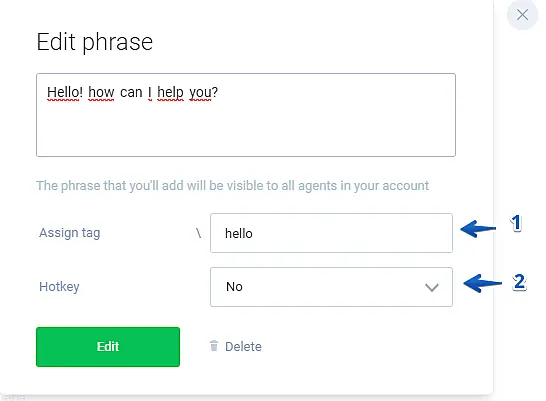
You can also assign the phrases to a tag to make it faster for the agents to locate and use them:
- Assign tags (for example: /prices)
- Hotkey (set up a shortcut to your phrases)
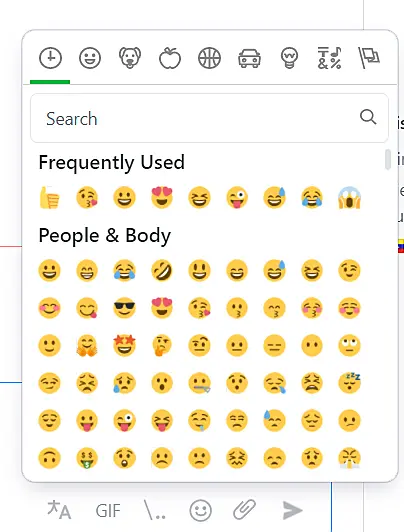
4.Emojis You can have happier customers, it is a fact that using emojis is great to interact with customers. Click on the emoji icon to use some during your conversations
5.Send file: You can send files directly from your app (up to 10MB per file)
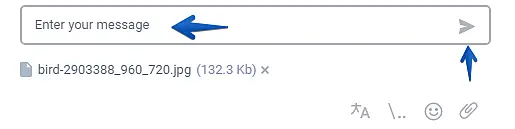
When you click this button, a window showing your PC folders will open. You can select a file for sending. You can also drag and drop files on the text input field.
A visitor will receive a file transfer request in the chat window:

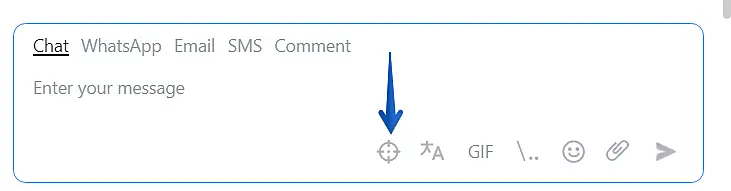
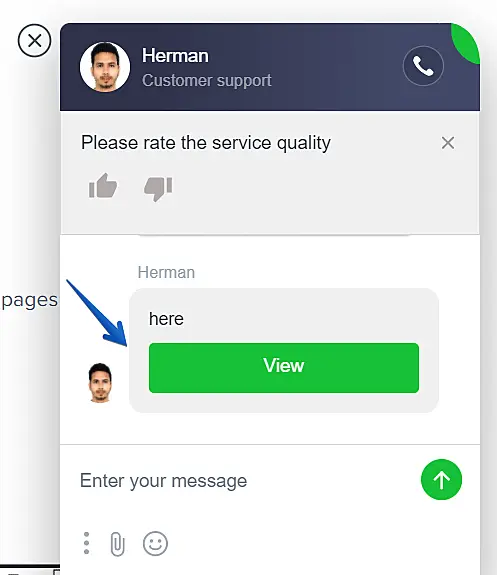
6.Pointer. This feature allows you to highlight an element on your website and send it to the visitor with a comment. A new window will appear when you press the "Pointer" button. In this window, the visitor's current page will be loaded:
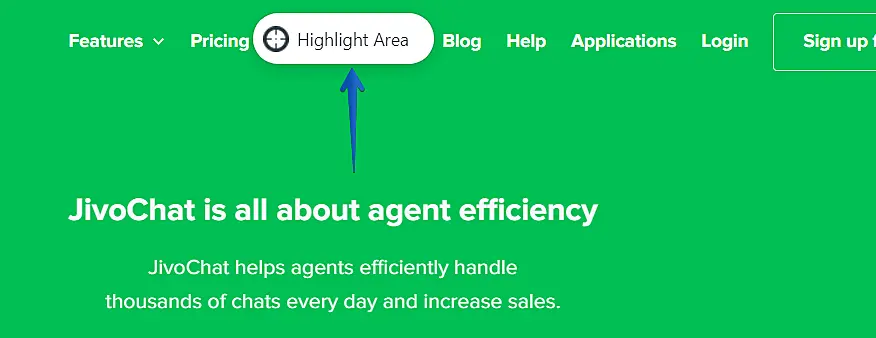
When the page is loaded you can select an element and add a comment for the visitor:

Next press the "Send" button. The visitor will receive a message with your comment with a VIEW button, and when they press it the highlighted element will be displayed on the page. This is how it looks like from the visitor's side:
Please note that the "Pointer" feature is not working on the pages with authorization, in other words on the pages where you should enter the login or password to get access.
App Settings
All application settings are stored in this section.
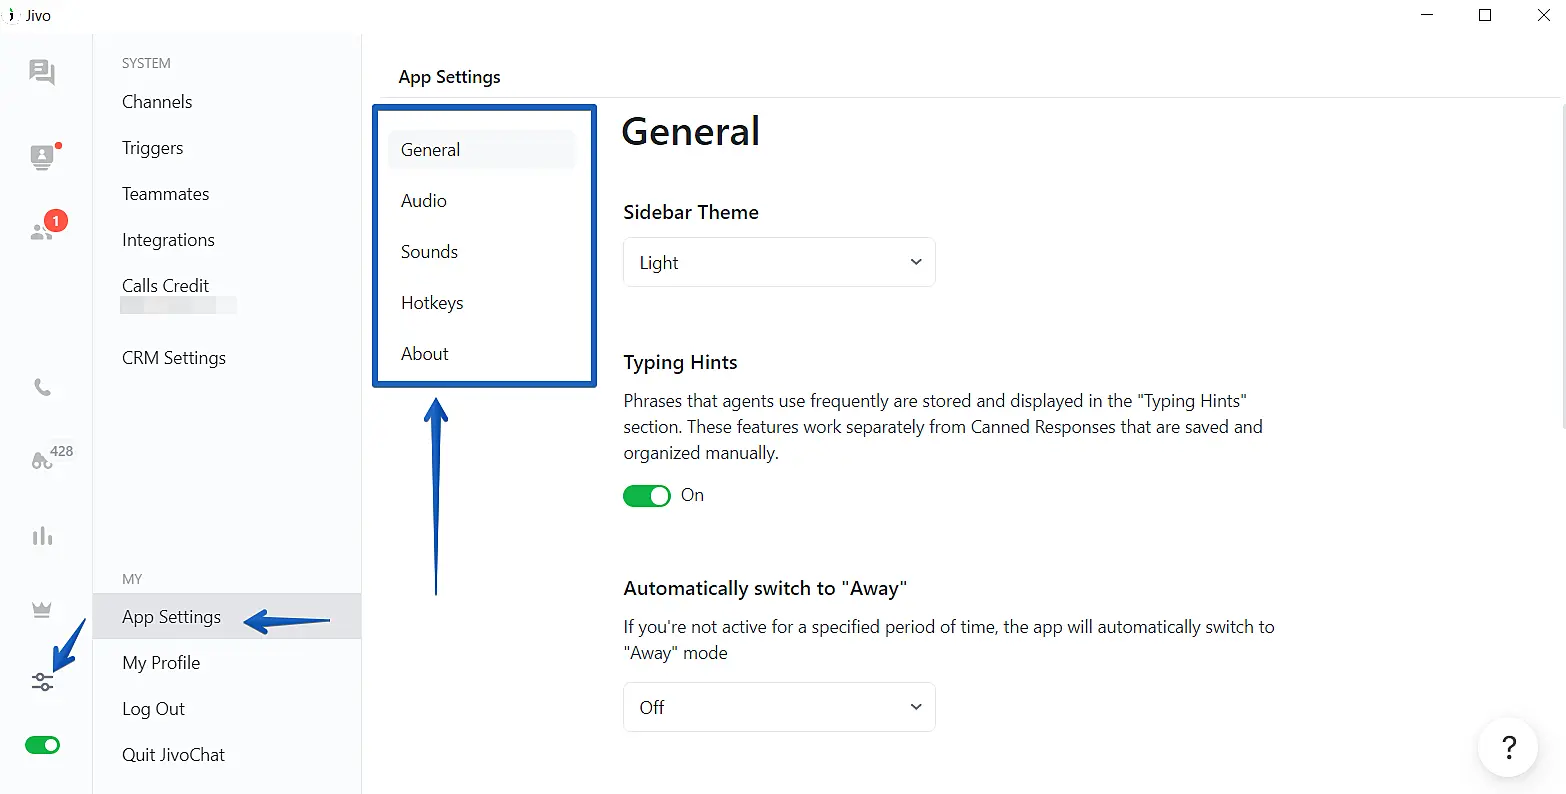
Manage -> App Settings -> General.
Sidebar theme. You can choose the dark or light color scheme for the sidebar.
Typing hints. This feature is also called "Phrases". Frequently used phrases are stored and displayed as a typing hints during typing. Phrases are stored on the agent's PC.
Automatic switching to "Away". The application will switch to away mode if you do not touch mouse or keyboard for the specified period of time. You can select the time period or disable this feature.
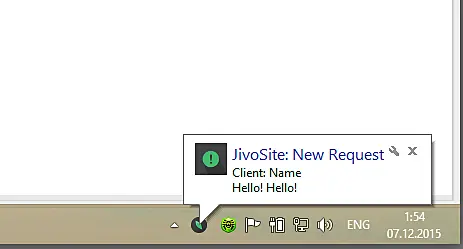
Notification type. Here you can select the type of notifications or disable it:
JivoChat default
Operating system
Language. You can select the language for the agent application interface. Currently, the following languages are available: English, Russian, Portuguese, Spanish.
App Settings ->Audio.
In this section you can select the audio input device and perform an echo test for your microphone.
App Settings -> Sounds.
In this section you can set up the sound of notifications. Also in this section you can turn on the sound notification when a new visitor enters the site.
App Settings -> Hotkeys.
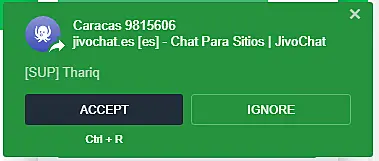
You can configure hotkeys for necessary actions. The default settings are:
- Accept chat: ctrl+R
Also, you can enable or disable global interception for Accept chat action. It allows you to use this hotkey even if the application is in the background.
- Go to previous chat in the list: ctrl+up
- Go to next chat in the list: ctrl+down
- Close chat: ctrl+W
- Blacklist Customer: ctrl+B
- Transfer chat: ctrl+T
App Settings → About
In this menu you will be able to see your app version.
Send log to developers. This feature is usually used on demand by technical support. If you press this button the application log will be send to our servers. The log file analyzed only if you contact our technical support team via (1) chat on our website, or (2) email info@jivosite.com, or (3) on our forum.
Manage your account
We added some new buttons in our application for you to manage your account easily
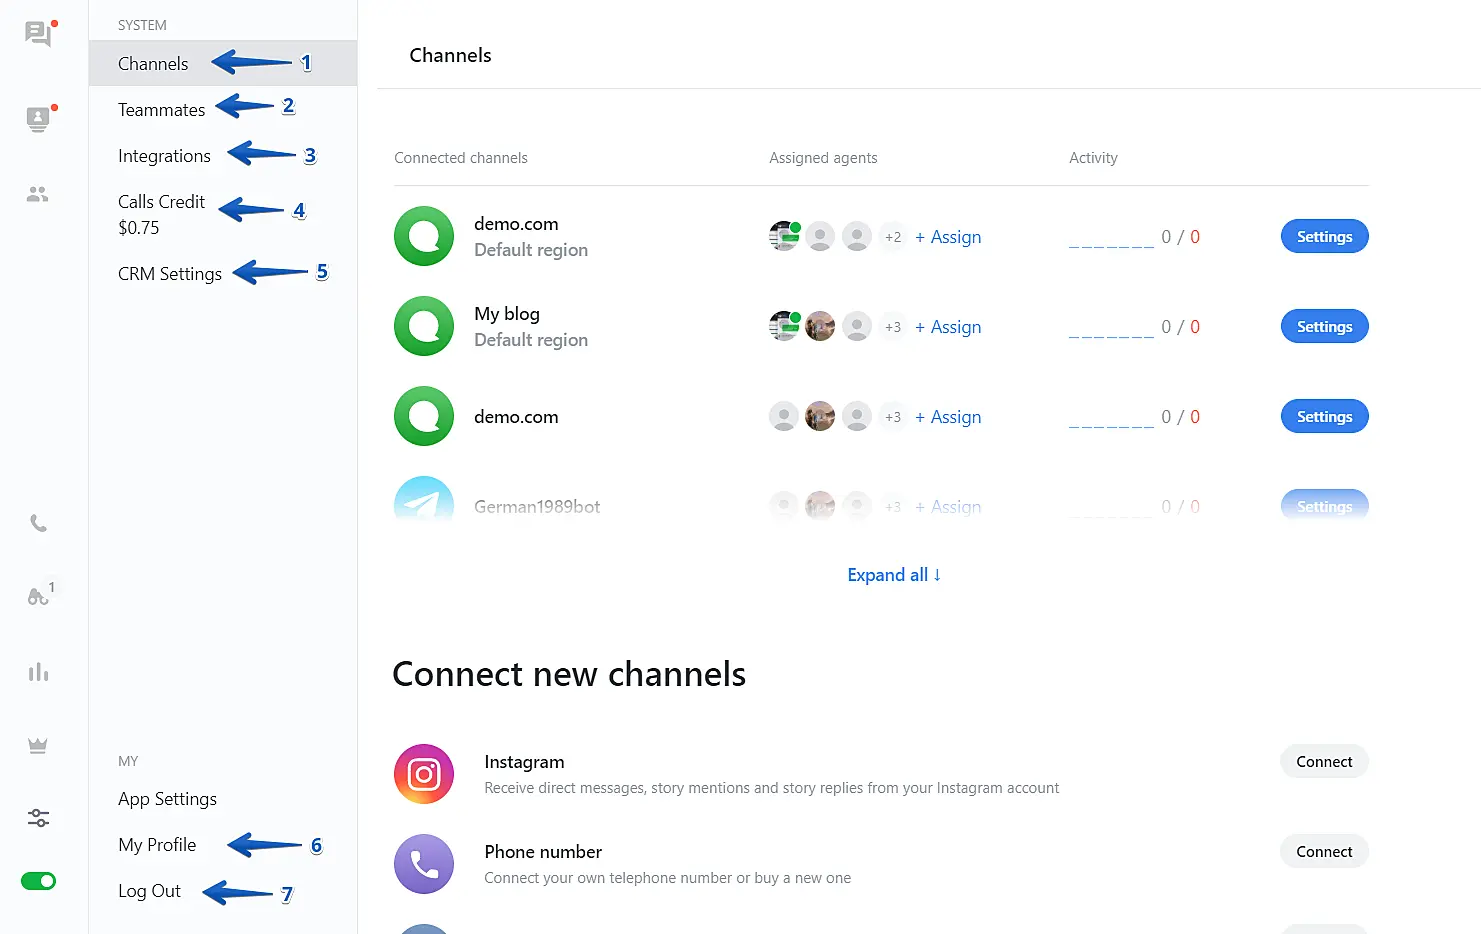
1.Channels: You can add new channels using this menu (including social networks, email and phone)
2.Teammates: You can easily add new members (agents) by using this new button.
3.Integrations: Access all of the available integrations with JivoChat. CRM, Bot and more with one only click.
4.Call credit: Check your telephony balance and your billing history for calls.
5.CRM Settings: Configure access to your CRM and sales funnel. Check more here.
6.My Profile A menu designed to easily change your profile picture, email or password. You can also set up different names for different channels and more.
7.Log Out If you want to change an agent you can press this button. It will open the login screen.
Only available in the Desktop app:
8.Exit Use this button if you want to close the application. Please note that pressing the "X" button in the application window will not close it, the application will continue working in the background. Please locate the icon on the taskbar to close the application completely.
That is all! We wish you a very productive day!

